
A Complete Bedroom Transformation: From Dated to Dreamy (Part 1)
After months of diligent hard work, I’m absolutely thrilled to finally unveil the first completed room in our new home – our master bedroom! This isn’t just a simple paint refresh; it’s the culmination of an extensive, whole-house renovation journey that involved everything from a full rewiring and replastering to laying entirely new flooring. Moving into a property that required such a comprehensive overhaul has been a monumental undertaking, but seeing our vision come to life, room by room, is incredibly rewarding. Today, I’m excited to share the initial phase of our bedroom’s incredible metamorphosis. The process generated so many details and photos that I’ve decided to split this reveal into two comprehensive posts. This first installment covers the foundational work – the demolition, preparation, painting, and the transformative flooring project. Join us tomorrow for Part 2, where I’ll reveal how we’ve meticulously styled and furnished this tranquil space to create our ultimate sanctuary.
The “Before”: A Glimpse into the Past
Stepping into our new house felt like stepping back in time. Our bedroom, much like the rest of the property, bore the distinct hallmarks of several decades of untouched decor. Imagine layers of old, faded wallpaper, tired carpets that had seen better days, and built-in wardrobes that felt bulky and outmoded. The overall aesthetic was certainly functional but lacked any sense of modern comfort or personal style. It was clear that this room was ripe for a complete overhaul, and we were eager to strip it back to its bare bones to unlock its true potential. We saw past the dated finishes, envisioning a bright, airy, and contemporary space that would become our peaceful retreat.
One of the biggest decisions we made was to live in the property throughout the renovation work. While challenging, it provided an immediate and very tangible incentive to keep things moving. After all, transitioning from our previous, immaculately decorated home to effectively “camping” on the living room floor of a dusty construction site was quite a motivator! Within mere days of moving in, we wasted no time tackling the bedroom’s immediate issues. We systematically peeled back layers of old carpets, meticulously ripped out the fitted wardrobes, and, perhaps most satisfyingly, stripped away that rather ‘delightful’ red vinyl covering one of the walls. This initial demolition phase, though messy, was incredibly cathartic, clearing the way for a fresh start in our exciting bedroom renovation project.
Demolition and Preparing for Replastering
With the carpets and bulky fixtures gone, the next crucial step in our bedroom makeover was to address the walls. This involved the laborious, yet essential, task of tearing down every last scrap of old wallpaper and carefully removing the skirting boards. Preparing the room meticulously for replastering is not just about aesthetics; it’s about creating a perfectly smooth, even surface that will ensure a flawless finish for years to come. Skipping this stage can lead to imperfections showing through paint, so we dedicated considerable time to ensure every wall was clean, clear, and ready to receive its fresh coat of plaster. It’s a messy job, but seeing the room stripped back to its bare bones is often the most exciting part, as it truly signifies the beginning of the transformation.
There’s something undeniably beautiful about freshly applied plaster, isn’t there? Its pristine, soft hue instantly brightens a room, promising a clean canvas for what’s to come. After the plaster had dried completely, the next vital stage was applying the ‘mist coat’. This initial, diluted layer of paint is critical for new plaster, as it allows the surface to breathe and prevents the topcoats from soaking in unevenly, which can lead to patchy results. While I always feel a slight reluctance to cover that perfect plaster finish, I know this step is absolutely non-negotiable for achieving a professional, lasting paint job. It’s all about creating the perfect foundation for our tranquil bedroom scheme.
Our overarching vision for the entire house was to maintain a light and neutral color palette, creating a cohesive flow between different spaces. For the bedroom, this meant embarking on a quest to find the perfect shade of ‘off-white’. This seemingly simple choice is surprisingly complex, as different whites can carry various undertones – some leaning warm, others cool. We meticulously sampled numerous shades, painting swatches on the walls and observing them at different times of day to see how the natural light influenced their character. Ultimately, we settled on Farrow & Ball Strong White. This particular shade is a beautifully soft white, distinguished by its subtle bluish-grey tint. This undertone provides a wonderful freshness, making the room feel bright and expansive, without ever feeling stark or cold. It strikes a delicate balance, offering a sophisticated backdrop that complements various decor styles and truly enhances the serene atmosphere we aimed to create for our bedroom sanctuary.
The Flooring Journey: From Original to Whitewashed Wonder
When we first viewed the house, I had grand plans to preserve the original floorboards. Their existing patina and aged character held a certain charm that I was very keen to retain. However, the realities of a full-scale renovation often throw unexpected curveballs. During the extensive process of rewiring the entire house and laying new pipes for the radiators, the original floorboards sustained significant, irreparable damage. It was a genuine disappointment to realize that saving them was no longer a viable option. Despite my initial hopes, we had to make the practical decision to remove them, paving the way for a completely new, more structurally sound, and aesthetically aligned flooring solution.
With the old floorboards removed, we moved forward with installing beautiful new flooring. This wasn’t just about aesthetics; it was also an opportunity to significantly improve the thermal efficiency of our home. Before laying the new boards, we installed generous amounts of fleecy wool insulation. This natural insulation material is fantastic for trapping heat, promising a much warmer and more comfortable bedroom during the colder months, while also contributing to better energy efficiency throughout the year. The combination of new structural integrity and enhanced insulation laid a solid foundation for the subsequent decorative steps.
Many who have followed our renovation journey on Instagram have inquired about the unique pale, whitewashed effect we achieved on our new floorboards. This was a deliberate and detailed process, executed by Graham and me, using standard pine boards sourced from our local timber merchant. To achieve this distinct light finish, I first treated the raw pine with Woca Wood Lye. This specialized lye product effectively bleaches the wood, neutralizing any natural yellow tones that pine often exhibits and leaving it with a beautifully soft, pale appearance. After allowing the lye to dry thoroughly – a crucial step for proper adherence – I then applied two coats of White Osmo Polyx Oil. This oil not only further enhanced the whitewashed effect but also provided a durable, protective finish. It was undoubtedly quite a process, demanding patience and precision, but the final result exceeded all my expectations. I truly could not be happier with how the pale, serene floorboards tie into our vision for a light and airy bedroom.
Naturally, with such a light finish, questions of durability arise. While the White Osmo Polyx Oil offers good protection, the finish itself is delicate. Consequently, I would hesitate to recommend this specific treatment for high-traffic areas such as a busy kitchen or an entryway, where wear and tear are constant. However, for a bedroom, which generally experiences less footfall, I am optimistic about its longevity. To maintain its pristine condition, I anticipate a light mop-down with a specialized soap every couple of weeks will be sufficient. Additionally, to offer an extra layer of protection and comfort, I may eventually introduce a soft, plush rug in the main sleeping area. This will not only safeguard the floor but also add another tactile element to the room’s design.
The “After”: A Clean Canvas Unveiled
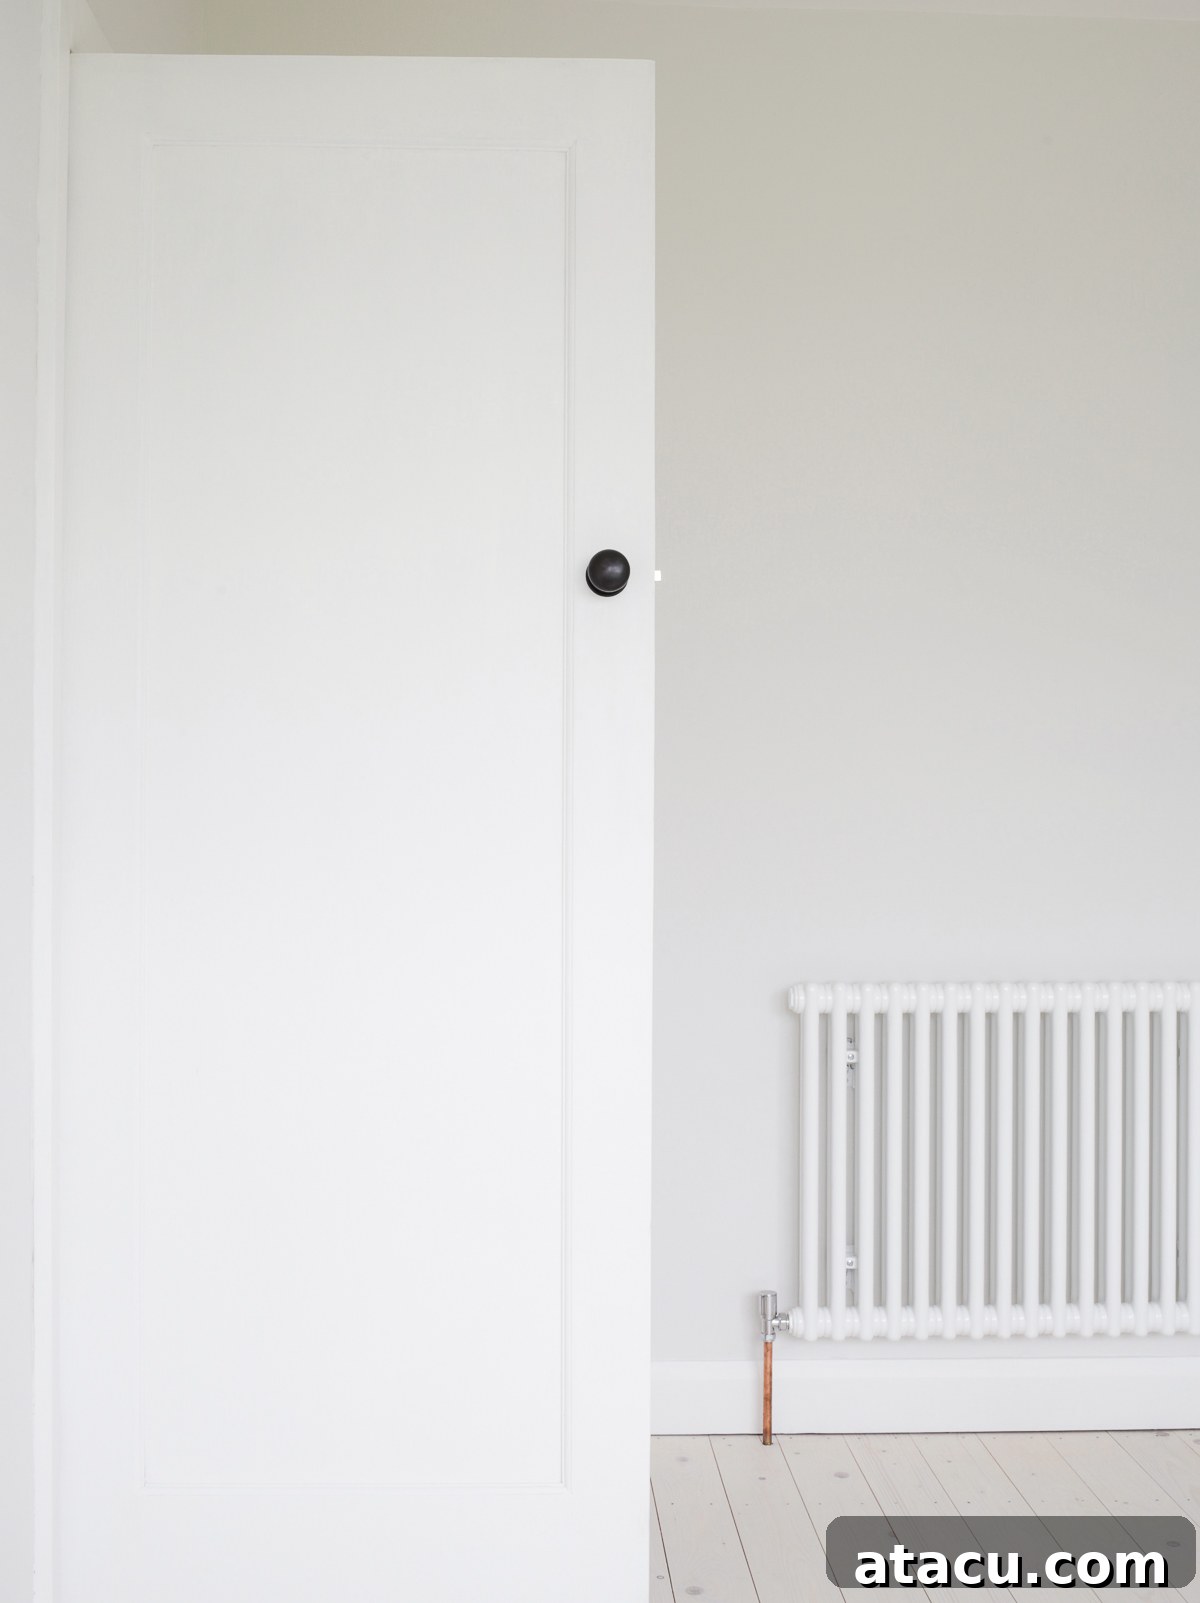
With the foundational work complete, the bedroom truly began to take on its new identity. After the meticulous replastering and redecorating phases, combined with the installation of the brand new flooring and the efficient new radiators, the room was completely transformed. Graham diligently fitted elegant column radiators throughout the house, opting for stylish and functional units by Acova. These choices not only enhance the room’s comfort but also contribute to its refined, contemporary aesthetic. The space now boasts clean lines, a fresh palette, and an inviting warmth, ready to be layered with furniture and personal touches. The journey from a dated room to this serene and beautifully renovated space has been immense, and we are incredibly proud of the structural transformation we’ve achieved.
The Thoughtful Details: Elevating the Everyday
Even with a fairly modest budget for the overall bedroom renovation, we firmly believed in investing time and meticulous effort into the smaller, yet impactful, details. We made a conscious decision not to cut any corners on elements that contribute significantly to the room’s character and our daily experience. One area where we chose to splurge a little was on the doorknobs. I’ve always felt that doorknobs are often overlooked but are incredibly important; they are tactile elements we interact with multiple times a day. Investing in quality hardware truly enhances the feel and function of a room. Here, they appear black in the images, but they are actually a beautiful, rich bronze. These exquisite doorknobs are crafted by From the Anvil, a renowned manufacturer known for their exceptional ironmongery. We sourced them from Broughtons, a charming, old-world shop located in Leicestershire. For anyone undertaking a period renovation project or simply seeking high-quality ironmongery and lighting, I wholeheartedly recommend a visit to Broughtons; their selection and expertise are unparalleled.
Our vision for the house blends contemporary style with a deep respect for its original character. To achieve this, we decided to retain some of the existing architectural features, particularly the internal doors. These older doors possess a certain charm and solidness that modern alternatives often lack. To give them a new lease on life, we had them professionally dipped. This process carefully removes all existing paint and varnish, leaving a clean, bare timber surface – a perfect blank slate. Once prepared, we painted them in Farrow & Ball All White eggshell. This particular paint finish offers a beautiful, low-sheen look that complements the walls painted in Strong White, creating a sophisticated yet harmonious overall aesthetic. The choice of eggshell also provides a durable, easy-to-clean surface, ideal for high-touch areas like doors.
With all the structural work, painting, and intricate detailing meticulously completed, the bedroom was finally ready for its next exciting phase: moving in the furniture. This moment always feels like a significant milestone in any renovation project, transitioning from a construction zone to a habitable, inviting space. The transformation was truly remarkable, turning a dated and tired room into a bright, fresh, and wonderfully serene environment, poised to become our personal haven.
And so, here stands the empty space – a pristine blank canvas ready to be filled with life and style after weeks of intensive renovation. This foundational ‘after’ represents the structural completion of our bedroom project. In Part 2 of this Bedroom Transformation series, I will delve into the exciting final stages, showcasing exactly how we’ve chosen to style and furnish this beautiful room, transforming it into the tranquil, contemporary haven we envisioned. You won’t want to miss seeing the furniture, textiles, and decor that bring this space to life!
Walls painted in Farrow & Ball Strong White, providing a fresh, neutral backdrop for our bedroom oasis.